Supported Bridge
Supported Bridge offers the benefits of a backbend with almost no effort — a favourite in restorative classes.
- Level
- Beginner
- Hold
- 1–5 minutes
- Focus
- Restorative backbend
- Steps
- 5 cues · ~1 min

- Rest on the block
Step by step
How to do Supported Bridge
StartLie on your back with knees bent.
- 1
Lie on your back, feet hip-width, knees bent.
- 2
Lift the hips and slide a block under the sacrum (flat bony area).
- 3
Lower the weight onto the block.
- 4
Rest the arms by your sides.
- 5
Relax and breathe.
- ↩
Coming out. Lift hips, remove the block and lower slowly.
Breath
Relaxed, natural breathing.
Focus
Restorative backbend
Why practise it
Gently opens chest and hips; restful.
Alignment
Cues & common mistakes
Aim for Block under the sacrum, not the lower back.
Teacher’s cues
- “Rest on the block”
Watch out for
Block under the lumbar spine.
Make it yours
Easier, harder, supported
Use the lowest block height.
- Legs extended over the block
- Block
In a sequence
Where it fits in a flow
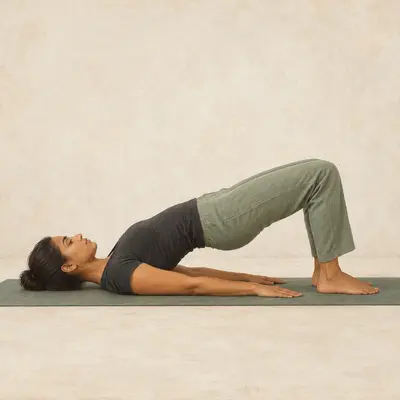 BeforeBridge Pose
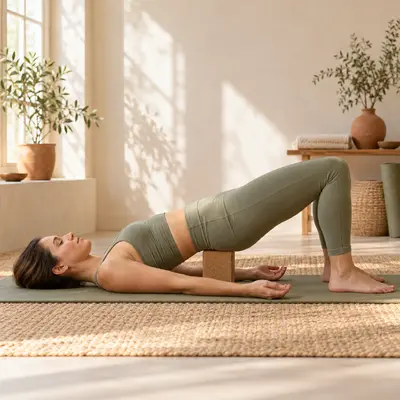 This poseSupported Bridge
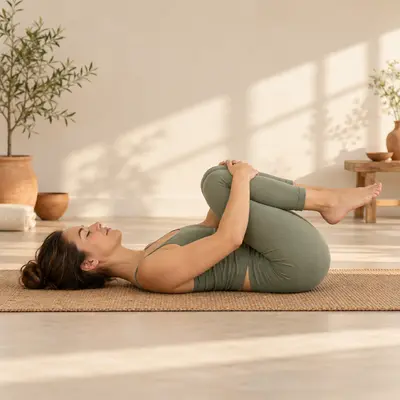 AfterKnees-to-Chest
Good to know
Questions
Where exactly does the block go?
Under the flat bony triangle at the base of the spine (sacrum).
A restorative adaptation of Bridge.
What helps
Props that make this easier
- Non-slip yoga mat A 4–6 mm mat with good grip makes standing poses steadier. View on Amazon
- Cork yoga block Brings the floor closer in forward folds and supported poses. View on Amazon
- Cotton yoga strap Extends your reach in hamstring and shoulder stretches. View on Amazon
As an Amazon Associate, YogiSoul earns from qualifying purchases. Links open Amazon in your country’s store.